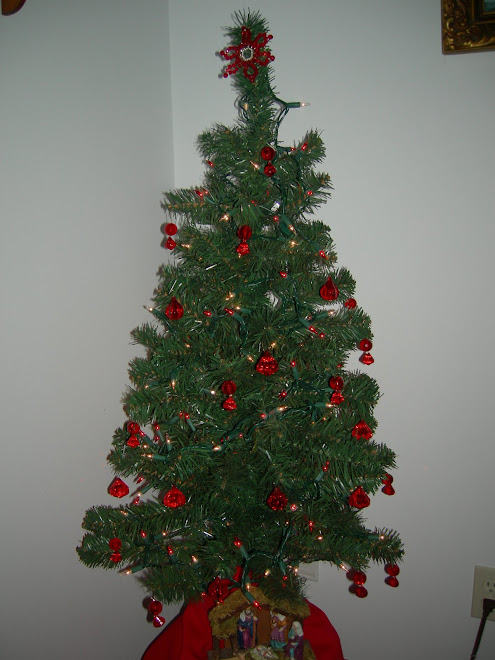
Hello, all. I have just come in from picking up my mail and there is plenty of snow to spare in our yard. Lots of ice, too. What a winter!!! For those of you who don't have any snow and want some, this little ornament could be just the thing. Most of us who live where there is a lot of snow would gladly send it somewhere, anywhere else. Yes, I know that excludes skiers and snowmobilers. So enough chat, let's get right to the task of making "Fluffy the Snowman"!! I had mentioned that left-over quilt batting was going to be needed for this project. I should have mentioned that it needs to be the fluffy white polyester type. The 100% cotton batts don't work well for this but save those scraps, too, because I have a future project that will use those scraps.
In the photo below, you can see the little snowman ornament and all the supplies you will need. Go to the end of this post and you will see what your end result will be..............Fluffy the Snowman!!

Supplies and tools you will need are:
Sharp scissors, toothpicks, styrofoam balls (two medium size and one slightly smaller), Tacky glue, polyester batting scraps, felt scraps (black, orange, green, red), wool scrap for scarf, acrylic puff paint (for raisin mouth), and some twigs for the arms.

To begin........Insert toothpick into the two medium size balls and as seen in photo above connect the balls. Add generous dab of glue at each joint (you can see this in photo) and then press the balls together.

From your batting scraps, select a piece that is about 18" long and 4" wide. Take this piece and tear about 1/2" of batting from each side of this strip. The reason for this - you do not want a clean cut on the edge of your batting. A jagged edge works best plus the batting stretches and will form around the styrofoam ball more easily.
Begin wrapping the batting at the bottom of the snowman. The batting will naturally cling/stick to the styrofoam ball surface. That's how I figured out this little ornament when my batting from one project stuck to the styrofoam balls of another project!!
Keep wrapping the batting around the snowman form. You can pull and stretch the batting, working your way aro

und and up to the top of his head. When you get to the top of the snowman form, pull off the excess batting and save it for another project. :-)
At this point, you will place a small dab of glue at the bottom of the snowman where the batting begins and at the top where it ends. That's all you need to do to keep the batting in place. You will have a "snowman mummy" shape like the one in the photo below when you have finished wrapping the batting. Set this aside and it's time to work on Fluffy's features, hat and scarf.

From the wool scrap, cut a 1" strip that is 12" long. Fringe both ends and then tie the scarf around Fluffy's neck. With the scarf in place, take a toothpick and insert where you would like the first twig arm to be. Wiggle the toothpick around so that the hole is big enough to accomodate the twig you will be inserting. A twig about 3" long works well. Repeat for other arm.

In the photo above you will notice a small piece of orange felt. I start with a 2 1/2" circle and cut it into four pieces (that will give me four noses). Fold over one straight edge and begin rolling this piece into a cone shape, then place Tacky glue along the final st

raight edge. If you roll this piece between your fingers you can shape the felt to achieve the look of a carrot. You could also make a nose from clay. When I made this ornament, I was doing it for a kid's class in Community Education and wanted all pieces to be made from fabric. I'll address a clay snowman project at a future time.
In the photo on the right, you can see Fluffy's nose. Snip the nose to size you desire and glue in place with the Tacky glue. Add the "coal eyes" (little pieces cut from felt) and with the brown acrylic puff paint make tiny dots to represent Fluffy's raisin mouth.
All that's left is to make the hat. Cut the following shapes from black felt....
one 2 1/2" diameter circle
one 1 1/4" diameter circle
one strip 3 1/2" long and 1" wide
First, glue the strip together by overlapping the ends and making a cylinder shape as seen in the photo below.

When this shape has dried place glue along the bottom edge and place in center of 2 1/2" circle. Let dry, then glue 1 1/4" circle to top of hat.

When hat is completely dry, you may trim away any overlapping edges. Also, in what would be the inside of the hat, make a small snip and trim out the center of t

he hat so that it will sit properly on Fluffy's head. If you wish you may cut tiny bits of holly and add to his hat. Dot with red glitter for holly berries. Add a loop at the back if you plan to hang this on your tree or just nestle in the branches as I have done in the picture on the right. Oh, and I added a heart for I think Fluffy needed one to keep him warm. :-)
This is a fun ornament to make and I designed and taught it to elementary school kids so I know that many of you can make these little guys. And perhaps some lady snowfolk would be great, too! This makes a fun family project or for kid's clubs, scouting projects, etc.
I have always wanted to make a whole tree full of these snowmen in all shapes and sizes and maybe this year I will achieve that goal. They would also look cute sitting on a shelf, lined up along the fireplace, etc. Last summer, I picked up a good size bag of styrofoam balls at a garage sale and with all the scraps I have in my sewing room, I could make a couple dozen of these!! Hope you find this a fun project.
Happy January!!
Sandi
 Directions and tutorial for my little diamond Redwork ornament will be posted in March. Thanks for your patience. I've been busy with crazy quilting projects and got a little behind!
 Supplies and tools you will need are:
 To begin........Insert toothpick into the two medium size balls and as seen in photo above connect the balls. Add generous dab of glue at each joint (you can see this in photo) and then press the balls together.
 From your batting scraps, select a piece that is about 18" long and 4" wide. Take this piece and tear about 1/2" of batting from each side of this strip. The reason for this - you do not want a clean cut on the edge of your batting. A jagged edge works best plus the batting stretches and will form around the styrofoam ball more easily.
 und and up to the top of his head. When you get to the top of the snowman form, pull off the excess batting and save it for another project. :-)
 From the wool scrap, cut a 1" strip that is 12" long. Fringe both ends and then tie the scarf around Fluffy's neck. With the scarf in place, take a toothpick and insert where you would like the first twig arm to be. Wiggle the toothpick around so that the hole is big enough to accomodate the twig you will be inserting. A twig about 3" long works well. Repeat for other arm.
 In the photo above you will notice a small piece of orange felt. I start with a 2 1/2" circle and cut it into four pieces (that will give me four noses). Fold over one straight edge and begin rolling this piece into a cone shape, then place Tacky glue along the final st
 raight edge. If you roll this piece between your fingers you can shape the felt to achieve the look of a carrot. You could also make a nose from clay. When I made this ornament, I was doing it for a kid's class in Community Education and wanted all pieces to be made from fabric. I'll address a clay snowman project at a future time.
  When this shape has dried place glue along the bottom edge and place in center of 2 1/2" circle. Let dry, then glue 1 1/4" circle to top of hat.
  When hat is completely dry, you may trim away any overlapping edges. Also, in what would be the inside of the hat, make a small snip and trim out the center of t
 he hat so that it will sit properly on Fluffy's head. If you wish you may cut tiny bits of holly and add to his hat. Dot with red glitter for holly berries. Add a loop at the back if you plan to hang this on your tree or just nestle in the branches as I have done in the picture on the right. Oh, and I added a heart for I think Fluffy needed one to keep him warm. :-)